The manufactured item’s size and dimensions differ from the original CAD model because the manufacturing process is not always the same. Engineers and manufacturers use a symbolic language called GD&T, which stands for Geometric Dimensioning and Tolerancing, to keep track of and discuss these differences.
What is GD&T?
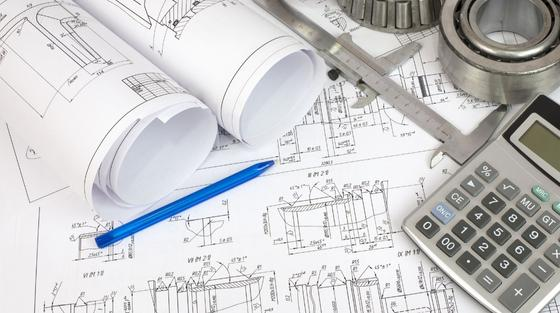
Engineering tolerances and relationships are defined and communicated using the Geometric Dimensioning and Tolerancing (GD&T) approach. Symbolic language explicitly describes nominal geometry and its permissible modification on engineering drawings and computer-generated three-dimensional solid models.
Working of GD&T
GD&T specifies a design’s required dimensions and tolerance value. The tolerance value for a design typically lies between the minimum and maximum limits. Tolerance is, in other words, the space between the maximum and minimum limitations.
According to the part’s aesthetic and functional requirements, the art of tolerancing comprises defining precisely the right variants for every specified design element to maximize the product approval rate within the constraints of the manufacturing procedures.
Why Implement Geometric Dimensioning and Tolerancing (GD&T) Processes?
All components must function properly in functional assemblies, multi-part products, or parts with sophisticated functionality. All pertinent fittings and features must be described in a way that ensures functionality while having the least negative effects on the production process and the associated investments. Due to greater reject rates and tooling changes, tightening tolerances by a factor of two can result in costs that are increased by a factor of two or more. Developers and inspectors can increase functionality without raising costs thanks to the GD&T system.
The fact that the system describes the design intent rather than the actual final geometry is the main advantage of GD&T. It is a representation of the object, same to how a vector or formula is not the actual thing.
GD&T Guidelines
A technical drawing must precisely represent the product without needless complexity or limitations. The following recommendations should be taken into account:
- A drawing’s clarity is more crucial than its correctness and comprehensiveness. Use a unidirectional reading orientation, explain the function of the part, group, and/or stagger dimensions, use white space, draw measurements and tolerances outside the part’s boundaries, and apply visible lines in real profiles to improve clarity.
- To reduce expenses, always design with the loosest possible tolerance.
- For all of the part’s dimensions, use the general tolerance indicated at the bottom of the picture. The broad tolerance will then give way to any specific, stricter, or looser tolerances mentioned in the drawing.
- Focus first on the functional elements of tolerance and the relationships between them, then go on to the remaining sections.
- Leave GD&T work to the manufacturing professionals whenever possible, and avoid describing manufacturing procedures in engineering drawings.
- Since it is presumed, a 90-degree angle need not be specified.
- Unless otherwise specified, dimensions and limits are valid at 20 °C and 101.3 kPa.
Summary
Partners associated with karkhana.io are experts at the GD&T method to increase the quality of your CNC machined product. Our experts can help you improve dependability and safety while reducing costs to benefit your company.
Sign-up for our online platform to begin your journey of getting a high-quality CNC-machined product


